For Electronic Projects:: //------website------// & //------Blog------//

Friday, December 7, 2012

How to create hidden user account in Windows XP, Windows 7

All windows operating system versions like windows xp, windows vista windows 7 provide a feature to create multiple user accounts. You can provides each user accounts some specific permissions. If there are more than one user accounts on a computer. They will be displayed on welcome screen. You can login to specific user account. In fact while displaying all user accounts on welcome screen has always some security risks. Somebody can hack your computer by just guessing your password as username is already displayed here. To make security more stronger on your computer, your can hide a user account from the welcome screen in windows xp, windows vista and windows 7 by simple hack as explained in following steps: -


  • Go to Start >> Run or Press Windows key+R.

  • Type regedit in Run dialogue box opened.
           If it prompts for your permission to edit registry, just press Yes.
  • After registry editor opens, just follow the path as given HKEY_LOCAL_MACHINE >> Software >>Microsoft >> Windows NT >> CurrentVersion >> Winlogon >> SpecialAccounts >> UserList
  • If you can’t see SpecialAccount under Winlogon, just right-click on Windlogon >> New >> Key. Name this key as SpecialAccounts.
  • Now right click on SpecialAccounts >> New >> Key. Name this key as UserList ( Case sensitive)
  • If SpecialAccounts and UserList are already present under Winlogon, You need not to perform above two steps. Just continue from below step.
  • Now right click on UserList >> New >> DWORD(32-bit) Value
How To enable user account login with username and password in Windows 7

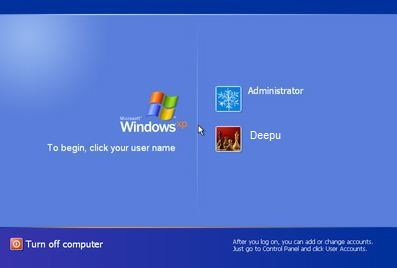
If you are running windows 7 on your computer , you will be well known that windows 7 use to show all user accounts on welcome screen which exist on your computer. One can select any one user account and subsequently can fill password for that user account and may be able to log in to computer. But this feature has always some security risks. As all the user account names are displayed on welcome screen. So your username is always displayed to anybody stranger. He don’t need to find your username. He can guess your password too and can log in to your computer. He can damage your system or can stole some important data from your computer.


To overcome this problem you can enable Windows XP style welcome screen where any computer user needs to enter USERNAME as well as PASSWORD on welcome screen after starting windows 7. So any computer user account name will not be displayed on welcome screen. So this can help you in hiding all user accounts from welcome screen. Besides you will be able to log in any hidden user account by this screen. To enable windows XP style log in screen which require password as well as username during log in, you can follow simple steps given below:-


Go to Start menu >> Run or Press Windows key+R

Type regedit in Run dialogue box

If it prompts for your permission press Yes.

How To lock and keep a password to a Folder without any Software in Windows 7, Windows XP


Although there are some trail versions available of folder lock software but these all come with an expiry period. So these can’t be used after some time. But by using the steps explained here, you will be able to create a folder which can be locked by password. All the data placed in this folder will be password protected. So you can place all data which you want to hide from other users in this folder. This method works 100% on all versions of Microsoft Windows operating system.
Just follow the simple steps given below:-


1. Open Notepad on your computer.

2. Paste the following code in Notepad
****************************************************************************
cls
@ECHO OFF
title Folder Locker
if EXIST "Control Panel.{21EC2020-3AEA-1069-A2DD-08002B30309D}" goto UNLOCK
if NOT EXIST Locker goto MDLOCKER
:CONFIRM
echo Are you sure u want to Lock the folder(Y/N)
set/p "cho=>"
if %cho%==Y goto LOCK
if %cho%==y goto LOCK
if %cho%==n goto END
if %cho%==N goto END
echo Invalid choice.
goto CONFIRM
:LOCK
ren Locker "Control Panel.{21EC2020-3AEA-1069-A2DD-08002B30309D}"
attrib +h +s "Control Panel.{21EC2020-3AEA-1069-A2DD-08002B30309D}"
echo Folder locked
goto End
:UNLOCK
echo Enter password to Unlock folder
set/p "pass=>"
if NOT %pass%==YOUR PASSWORD HERE goto FAIL
attrib -h -s "Control Panel.{21EC2020-3AEA-1069-A2DD-08002B30309D}"
ren "Control Panel.{21EC2020-3AEA-1069-A2DD-08002B30309D}" Locker
echo Folder Unlocked successfully
goto End
:FAIL
echo Invalid password
goto end
:MDLOCKER
md Locker
echo Locker created successfully
goto End
:End
******************************************************************************

Kaspersky internet security 2012 Lifetime Use without license key:

1) At first disconnect your internet connection and Remove modem or Disconnect that Ethernet Cable. it is
    very nessery that to get liftime Key of Kaspersky internet security 2012 .
    Delete the existing key (If You Have)


2) Now Open Kaspersky 2012 product Then Click on (Either KIS or KAV) settings
    Uncheck the “Enable protection” Check box


3)Go Then “Options’ In the settings window itself ,
   And uncheck Below Line

a) “Enable Self-Defense”

b)”Disable External service control”


4) Goto Start>Run>Type “regedit”>
    
    Now enter then find

    HKEY_LOCAL_MACHINE>SOFTWARE>KasperskyLab>environment.

    From Right list >> double click on “ProductStatus”

    Then , in the “Value Data” Field . replace “Released” with “Beta” and click OK